Wednesday, December 17, 2014

12.16.14- Night shift

Mp#0-

We worked with the robot program to get the parts without breaking the side tabs. Roy and I adjusted positions and played with speeds and timing until we had them running acceptably.

Mp#21-

The robot would not power up.
We initially thought the problem was related to an axis off switch condition but later found the drives were all showing error 3 - under voltage fault. Traced it back to the contactor which was apparently just stuck a little. I freed it and it began working fine.

Mp #4-

The mold setter requested four new small length hydraulic hoses so that we can get away from excessive wear from hoses rubbing on the machine because they are too long. I made 4 new 24" lines w/ fittings.
Also had trouble with the set signal on the cores for the mold they put in it.

Harpo work station-

I mounted items to the control cabinet. Put the PLC in and powered it up, downloaded the SOLEPLT1 program that I uploaded from the firstbstation. I also knocked out the holes for the E-stop panel and mounted the switches we had.

Have a great day!

Friday, December 5, 2014

12.4.14 - Night Shift Activities

Mp#28- Added the liquid color feeder signal to the machine. Checked operation, O.K. to run. Also drilled and tapped the hopper throat for the color tubing access.

Hopper #4 in Mezzanine- The suction valve cylinder was remaining open causing everything on that pump not to load. Checked the spring return on the cylinder and it was fine. Found the problem to be the exhaust port clogged with dust and oil debris. Cleaned and reinstalled the exhaust fitting and checked operation. No further problems.

Had another issue with the floor in front of molding. Ask me about it and I will tell you!

Call if you have any questions.

Have a great day!

Thursday, December 4, 2014

12.3.14- Night Shift Activities

Mp#0-We got the robot set up to pull parts. Ran a few shots and realized the bottom core block was not releasing correctly. Found that the mold was missing the horn pins for the slide. They were broken and nowhere to be found. We pulled the front and tooling made some new ones. Then we started it up running on the robot at approximately 5 a.m.

Mp#24- The material loader suction motor wore out. I broke it down and found the brushes worn out and the commutator was so worn that entire motor replacement will be required. There wasnt one in stock so we need to order one asap unless there may be one at algood whse.?

MP#4- Nozzle band had bleed off.  Had to replace the tip band and thermocouple.

Also looked at the mitsubishi PLCs in the pad printers. They all have the Melsec plcs model FX1n.  We should use the GX-Programmer software or more current. Programming cables are about 25$.

Tuesday, December 2, 2014

12.1.14 Night Shift Activities

Wired the mold that Kenny and I discussed would need sequence valves installed for the required part eject logic. It will need to be connected to both Core 1 and 2. the cables are labeled respectively.

Mp#0- The tool had to be repaired and was not finished on our shift for us to be able to start it on the robot.

Mp#3-The tube extension tool was hung and I had been asked to wire the mold last week for the corlogix. Unfortunately, it cannot run in the Milacron machines using the switches because of the logic sequence it requires. It must run on timers because the ejectors must move forward before the cores are fully set so that the parts will remove from the cavities correctly. When the mold comes out again, I will need to remove the switch hardware.

Mp#19- The grinder would not start. Found a loose connection in the screen safety circuit.

Mp#1- Nozzle bled off and they lost the end nozzle heater band. Replaced it with a new one from MRO as the old one was not repairable.

Mp#23- Had an issue where the cores would not work because of an ejector back switch fault. The actual problem turned out to be due to a bad core pull switch on the upper cylinder. It was staying made which caused the machine to stop pulling it prematurely, which in turn, caused the ejectors to extend with the upper cylinder improperly located. This caused the pin behind the core to break and stick out slightly, not allowing the ejectors to make the back limit switch. The mold will be removed for repair and a new core switch installed at that time. Ronnie and I found a new Warner magnetic 2-wire prox in MRO.

Have a great day!

Tuesday, November 25, 2014

Thursday, November 6, 2014

11.6.14 Night shift activities

We had a scheduled power outage Thursday night and shut down at midnight.

Continued working on the Corlogix box #3.

Had an old service parts tool in #23 that needed the thermocouples rewired and labelled.

I put away the hydraulic fittings that came in. The hose crimp fittings are near the hose crimp machine.  The others are in the bins.

Roy and I reviewed and edited the robot program on press #0 for two parts but when we began to start it up we found the pins broken. The tool was pulled out for repairs and rehung but was not started up so no parts were run. The program will need to be checked out at start up.

Wednesday, October 22, 2014

10.21.14 Night Shift Activities

Wired the Mold in #2 with our regular 6 pin connector configuration.

Installed the service call light on Mp#0. It works good, but the mold setter has some concerns that it may too high to get the crane pendant around when he is moving tools around.? I told him I can come back and shorten it if it looks necessary.

Mp#4- Had some issues with a control fuse fail alarm. Found that the tool that went in had a jumper in the 6 pin core plug connector that was causing a direct short. I removed it and replaced the fuse.

Mp#27/28- checked the gender on the cores, changed fittings on #28, and color coded them. They are O.K. to run.

Mp#0-Grinder blew 2 FRS-R-30 amp fuses. I replaced them, and cleared the blades.
also-The pin broke in that tank mold again and the techs wanted to change the robot program to run Vac 2 only so we edited the program and removed all of the related Part Grip 1 instructions in it.

Have a great day!

Tuesday, October 21, 2014

List of Molding Items and Projects Ongoing - (sent to our maintenance group only)

Sorry this is long-part of trying to organize to stay on task.

Conveyor Belts
  • The gearbox is leaking and needs replaced. They run around $350 for new ones. We can get them from many places online such as PLC Center or Grainger, etc. We may have a spare somewhere, but I looked in MRO and did not locate one.
  • The model is a Boston gearbox Cat No.F715-50T-B5-G, INPUT HP:.270, Ratio 50, OUTPUT TORQUE: 351.
  • The conveyor belt itself needs replaced on Mp#12, it has a major tear/cut in it. We should be able to make one in-house.
 
 
Mp#9
  • The aluminum hopper access safety ladder is located in the bunker and still needs to be installed. We should have some pieces of aluminum rail in the shop to facilitate that install, although the holes may have to be relocated to account for the taller machine size.


Mp#5
  • The hydraulic hose on the upper traverse cylinder needs replaced. It is blistered and likely to fail soon. I think Kenny is already checking on a replacement.
  • The liquid color signal cable also needs rerouted or replaced and mounted within an electrical box.

Mp#4
  • The conduit going to the heater band wire terminal box is damaged and the section needs replaced, or repaired with a conduit body. I recommend replacing it completely.


Leaks

Mp#14- small leak under clamp valve stack, needs O-rings replaced.
Mp#27- small leak under clamp valve stack, needs O-rings replaced.
Mp#21- small leak under clamp valve stack, needs O-rings replaced.


 Door Glass Replacement

Mp#4- Rear door glass needs replaced.
Mp#7- Rear door glass needs replaced.
Mp#10- Front door glass is cracked.
Mp#13-Rear door glass needs replaced.
Mp#21-Rear door glass needs replaced.

E-Stop Pushbutton Padlock attachment project

The following machines remain to be modified: 6,7,9,13,14,18,20,21,27,and 28. (10)
This will require that we order 10 Allen Bradley 800T-FX6D4 E-stop switches with 2 contact blocks each (20 total).
 This will also require 5 more of the 800T-N314 Pushbutton padlocking attachments to complete this job and permit us to lockout the E-stop pushbutton devices at the operator stations.

Service call Lights

Mp#0 and #1 are the only two lights remaining to be installed. They will be remotely installed so that operators can have quick access to them from the injection unit end. The lights, cable, conduit, and boxes are in the shop and these will be installed during times when they are not in production.

Core Standardization within Molding

Getting the Machines standardized against the molds has been a challenge during this transition. With exception to Mp#0 and Mp#1- I think we have all decided to standardize all of the other presses to use the quick disconnect fittings that we stock in the MRO crib.


The idea follows the gender rule that if something is flowing out of it-then it should be a male fitting.
Likewise- if flow is moving into it- then it should be female.

Standard being:
Male for the SET side = Green Color Code
Female for the Pull side = Red Color Code

This color code applies to both Machines and Molds which, upon completion, will better expedite mold changes and avoid unnecessary delays of adapting hydraulic fittings.

*Additionally, if the connection does not work correctly, this should eliminate concerns of the machine being the problem and assist in locating the real underlying issue on the mold.

At this time, the following presses remain to be changed over, color coded, and checked for correct operation: 6,7,9,18,20,21,27,and 28. It also would not hurt to check the others and re-freshen with spray paint colors.

*Some other considerations that have not been determined yet are for the standardization of the air gate valve lines, the hydraulic gate valve lines, and/or air core/poppets. I would suggest that since many have blue and orange lines already in place, that we come up with something around those colors.? Any thoughts?

CORLOGIX

"What is Corlogix?" ...it is a made up name to call a Core Signal Logic Box. It's also the PLC program name.
The Corlogix boxes were/are being constructed to accommodate the problem with voltage drop across the multi-voltage sensors that were run on 110VAC in El Paso on the Van Dorn machines.
The Corlogix box uses the PLC to signal condition the 110VAC into a 24VDC signal that Milacron and our other machines use as core input signals.

Because of the fact that TTI already has so many of these sensors in use on their molds, it was determined that it was not cost effective, or even practical to convert every mold to a mechanical limit type switch. The Corlogix approach was a workable-cost savings approach that has been proven to work at other injection molding shops.

Additionally, it was decided that we would continue to use the already present 12 pin Trylok connectors currently on the TTI Molds when they arrived. For two reasons- we needed additional pins in the plugs for inputs, and we had many of them.

What is important to understand about the Corlogix project is:
  • Molds wired for Corlogix cannot be hung in MP#0 or MP#1 at all. Those tools must stay in their original configuration-as they were from El Paso.
  • 110VAC -IS APPLIED- to the sensors in/on the mold, so damaged cables must be handled with care and repaired immediately.
  •  24 Volts DC is connected to the IMM at normal connection points.
  • If the ejector back switch is used, it must be connected to Cable #1 on the Corlogix box, and turned on.
  • The "Code" on each mold should be determined when the tool is wired. this sets up the logic within the PLC as to monitor specific PLC inputs (i.e. 2 switches, 4 switches in series, one switch on each side, etc..)
  • Molds that do not employ these AC sensors should simply be converted to our regular 6 pin configuration.
  • I will be updating all of the Corlogix notes, files, tables, schematics, and diagrams to the equipment list under the cores section soon for reference.


 I still have more work in finessing the two boxes in use at this time, getting all of the lights working correctly, and constructing two more units. So any suggestions or help on them is welcome.

Have a great day!


Tuesday, October 7, 2014

Dryer Situation

The dryer I worked on last night turned out to have had a bed heater contactor that had welded closed across the contacts. This caused the heaters to remain in an energized state indefinitely. ..which ultimately led to the meltdown condition.

Welded contacts are a typical problem for contactors that resistive loads with dry contacts.

Additionally, the dryer was designed without fuse protection in the heater circuit.

The manufacturer designed this particular dryer model to rely on only control monitoring parameters to avoid this problem (setting over-temperature limits, etc.) Which we will ensure are set correctly once repairs are complete.

As it stands, the majority of damage was done to the hoses, dessicant,  and some insulation.

Thursday, September 25, 2014

9.24.14 Night Shift Activities

Worked on conveyor for Mp#27. I added some pvcc stock to prevent small parts and runners from getting underneath the side rails. This has been occurring frequently jamming the conveyor belt. There are two more like it that also need the same modifications.

Mp#21- Checked out the robot conveyor wiring. I had already wired it correctly but it wasn't operating because the relay base was bad. I replaced it with Allen-Bradley and checked for proper operation.

Mp#4- Finished wiring changes to cores and repaired some damaged wiring while I was there.

Mp#5- Repaired some broken wires on the mold. They were using wire nuts to hold switch wires together on the cylinder that must be removed each time the tool is pulled or set. I added quick connect plugs.

Mp#14- Finished installation of service call light. We still need to order four more for the added presses.

Have a great day!

Wednesday, September 24, 2014

9.23.14 Night Shift Activities

Mp#28-
Worked on the granulator. The clasps that keep the side clean out door closed were evidently damaged and needed replaced. Went ahead and replaced gasket on the door also. Tightened loose screws on everything and replaced those which were missing. The belts looked fine and the size number is shown in the image attached here for future reference.

Mp#8-
We had a temperature controller issue on one of the old the Nissei ASE machines. There is a contact that must close on barrel heater zone 1 to allow the screw to rotate. It is there to prevent a cold start up but- it was up to temperature an d not closing internally.  We swapped it with another controller and it corrected the issue.

At one time Mark and I had started replacing the old analog controllers with newer digital upgrades but that got pushed back with the TTI machines.

Mp#10-
NISSEI alarm "1216"
Ejectors would not work, even though core set/pull operating correctly.
I found the problem related to the core sequence settings and the clamp position switch locations. (Adjustment)
On these older machines, it is critical that the mold correctly make the intermediate position correctly.
In sequence 3, that position is where the mold will stop and pull cores and then open to the full position, where it will eject parts...if it does not see the position switches correctly,  it will just open all the way up and then fault out.

Tuesday, September 23, 2014

9.22.14 Night Shift Activities

Mp#0-
Had some issues with input 40 not reading because EOAT was not retracting brackets correctly. Kenny and I found bad solenoid valve and swapped it with a spare temporarily until we can get a replacement.

Numatics225-285B
24VDC 6.3 watts
Replacement Unit No.
#081SS400M000061

Mp#1-
Techs accidentally overtravelled the Z axis and couldn't get it to power back up. We ended up manually activating the brake on the X axis and moved it out of the mold area. It then allowed us to power it up and move it from the overtravelled condition.

Mp#2-
Finished wiring 24 common circuit into core switch receptacles. Only Mp#4 and #5 remain to be done as scheduling permits.

Began construction on another Corlogix box. I will check with MRO to see what parts are available and give Kenny a list for the remainder of items needed.

Have a great day!

Thursday, September 11, 2014

9.11.14 Night shift activities

Marty and Sean wired in service call lights on Mp#7,9,18,20, and 21. We also mounted boxes on several others.

Mp#0, 1, 27, and 28 will need new call lights purchased for them.

Roy Smith, Cory Lemmons, and Mike Sells worked on PM's for the presses scheduled to run on Monday.

We all worked from 3p.m. until 11p.m. with no lunch taken (8hrs).

Thursday, August 21, 2014

8.20.14 Night Shift Activities

Changed out a loader motor for Cory that was taggedcbad since March 2013. It was the last one in MRO.

Mp#12- hooked up the air poppet solenoid for the gates. Had to add fittings for tubing.

Wired solenoid for:
252- injection signal
67- 24 vdc

Roy changed out nozzle band heater on Mp#25.

Mp#- 1- ran great all night, robot had no issues. Great work Kenny Hoskins!

Multishot systems rotary platen water issue.

Found that the mold was watered incorrectly.  It was an honest mistake though because of the way that the rotary coupling joins up supply circuits internally.

After getting the mold plumbing straight, it chilled down to 62 before I shut off the cooling water.

See images for details.

Saturday, August 16, 2014

8.15.14 Night Shift Activities

Roy Smith and Mike Sells finished making the modifications to the conveyor.

I shortened the wotk station six inches and moved it to the staging area.

I also changed out five heaters in one of the dryers and it is ready to check operation.

We worked 4 hours.

Tuesday, August 12, 2014

Grinder issue

Problem originated from day shift. The grinder would start and run until parts were put into it. After which contactor would begin to chatter (such as coil dropping out). Normally the most frequent problem with these grinders can be traced to the safety circuit switches.  In this case I could find nothing wrong with any of the control components.  After watching it in operation. ..I discovered one of the control fuses off the transformer was arcing and incorrectly mounted to where it was just barely making contact. I checked the fuse and found it to have changed resistance value. I replaced it and made sure the others were installed correctly.  No further problems.

8.11.14 Night Shift Activities

Mp#13-Fuse blown control issue.
This problem originated from day shift where the power supply had a fuse holder melted.

There was an additional 10amp fuse blown with a fault indicating that the purge sheild LS99 was not made.

Upon replacing the fuse everything seemed fine until the pump motor was started. 

After a few minutes of pump run time the fuse would blow again.  Reviewing the schematics revealed the "CE" solenoid is energized through a motor starter contact.

Found "CE" solenoid was bad. Replaced it with spare from uninventoried parts. O.K. to run.

Tuesday, August 5, 2014

Mp#27 injection carriage cylinder leak

The sled cylinder shaft seal needs replaced on Mp#27. It was found leaking oil in the floor. I cleaned up the oil and put an absorbant pad under the leak. Maybe Kenny knows if we have another seal or where we can get one?
Please add to the list!

Thursday, July 24, 2014

7.24.14 Night Shift Activities

The Door glass was replaced on the presses and the reinstalled on Mp#1. The ANSI compliance gates under Mp#0 and #1 were modified with a hinge by Mike Sells.
Andy made up over thirty new waterlines for the molds with quick disconnect fittings and refilled the FRL's in molding and on the mezzanine.
Roy chased out the platen holes on MP#27.
I corrected the phase on Mp#27, for pump and receptacles. I put the conveyor control box together for press #11.

All that remains is mounting the box and tieing the conveyor motor into it.

I am not sure if they got the bolts painted, the hose reels mounted, or any lubrication done to Mp#27 at this time as everyone left at different times around 7.

There is no more plexiglas left, more will need to be ordered.

Have a great day!

Tuesday, July 22, 2014

7.22.14 Night shift activities

Put together an adapter to connect the Hoover molds to the Oreck machine connector standard.  Jumper switches allow the user to choose whether or not to use core and/or ejector back limit switch depending upon each specific configuration of each tool.

We also had an issue with the robot on Mp#0. Charlie requested that I set up the robot to operate using vacuum on only the bottom cavity. We attempted to tie both vacuums into one but it kept failing the vacuum back check for various reasons.  Marty didn't want to wait for me to research the program. So they ran it one cavity by manual operator.

Saturday, July 19, 2014

7.17.14 Robot Install on MP#11

We worked hard getting MP#11 robot removed from the press and the newer Star AC Servo robot in place Wednesday night. Most of the team was excited to get involved and viewed it as an "upgrading activity". We chose not to attempt a forklift removal since both cranes were available to utilize and it just seemed like a safer approach with so many involved. Special thanks go to Roy Smith, Andy Brown, Kenny Gibson, and Marty Tays for getting their hands dirty on that project.

Thursday, the robot interfacing was finished up and tested successfully. Some changes were added to ensure the safety gate and E-stops were functioning correctly. Those changes were listed on the sheet I gave to Mark Mckee. The previous robot had some issues that were most likely caused from the interface being located under the water manifold on the stationary side of the machine, as obvious corrosion in the connector warranted replacement of the entire assembly. Luckily we had the one left over from old MP#6 to use. I relocated it closer to the robot power transformer for ease of viewing and dry access.

When we initially powered up the robot, there was as servo driver error that came up for the vertical axis that apparently stemmed from the loose driver card connector I found upon inspection. It is ready for operation at this time.

I hope everyone had a great weekend!


Friday, June 27, 2014

6.27.14 Night shift activities

Mp#6, #7, #9 -platens have been stoned and sprayed with light coat. Holes all chased out.
Robot on #9 has been checked out and is ready to operate.

Mp#0- Thermolator is now working fine and tested.  It now has three new pressure gages also.
480 Cord on the hot stamp roller has been changed to the molding style.

The feedthroat lines are finished on the 170's.
The dryer hopper potter project is also complete.

Have a great day!

Wednesday, June 25, 2014

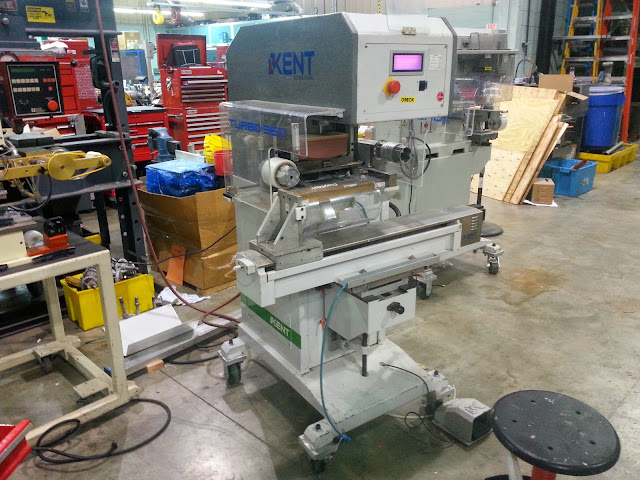
Turbo 350

I worked on the Turbo 350 pad printer and made all necessary repairs.

I set it up to run the Dayton graphic, made set up notes, and placed them in the back of the printer manual.

Mitch and I put the ink cup back in the ink clean up area and the cliche in the blue storage cabinet.

I also continued on the robot installation on mp#7.

Have a great day!

Thursday, June 19, 2014

6/19/14 Night shift activities

Robot interface on Mp#20 now matches that of Mp#18. I left the wire diagrams on Mark's desk.

Cory and Roy finished all of the platen holes on Mp#0, stoned them and put lightcoat on them. The tie bars need relubed again.

Marty finished the same things on Mp#18.

I also finished routing / connecting the cabinet wires for the robot on Mp#1.

Have a great day!

Ejectors not retracting on Mp#21

Ejectors would not retract but you could hear the pump loading and output RT was being energized on the I/O page. Found wire to Solenoid valve was cut.

Friday, June 13, 2014

6.12.14 Night Shift Activities

Marty and Cory built many pallets for the molds.

I finished installing the vacuum switch on MP21 robot. I looked through all of the the totes and could not locate any vacuum switches however. I borrowed one from the robot on MP#1 until we can locate more of them.

On MP#0- I completed the lube job and signed off on that.

On #0 and #1 presses, I connected the sled cylinders to the injection carriages. I began routing the cables across and under the machines. While I was up there I noticed that the end of the servo on #0 robot Z-axis has been damaged, probably during shipping? It may still work but I would not trust it.

The other guys finished up at 4:30 and decided to leave so I went with them as there were no other employees here at that time.

Have a great day. Call or comment to the blog if you have questions, etc.

Sean

Tuesday, June 10, 2014

Access Cards

We ran into a situation tonight where we needed an access card for the Van Dorn in order to complete the mold change.

Do we know when those cards will be distributed so that we can proceed with continued molding operations?

Let me know thanks!

Friday, June 6, 2014

Hot stamp Rollers

The past week has had our team busy in many areas one of which has been working with the hot stamp roller machines. All of which have needed extensive attention to get into reliable operating condition.

NOTES

A few notes I wanted to make are on the temperature controllers they utilize.  It is important to understand that the outputs must be allocated upon set up so that the SSD and Relay contacts are configured correctly ro work with the PLC controls.

Also be awarevthat the PLC will interupt the heat controls if the temperature controller settings are not correct in this application.

One way to verify this is to compare settings from another machine within the first three levels.

Also remember that to move up or down levels - "levl" must be flashing after the ↑↓ buttons have been held down for three seconds.

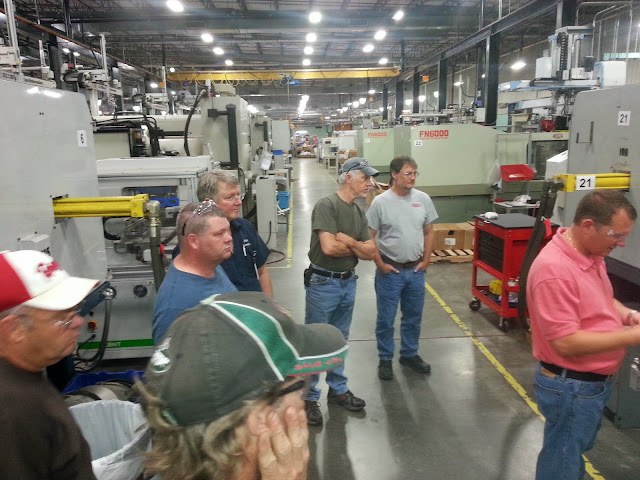
Pad Printer Training

The pad printer training was very informative and both maintenance and process technicians from each shift were able to attend on 5/29/14.

It was important to our group that everyone received the same information from an authoritative source.  Overall I think it was successful and feedback from everyone was good.

The Q&A session, led by Diversified Pad Printing experts, explained proper handling of the cliches,  cup set-up, and parameter adjustments in addition to common pad printing process issues.

This was also an opportunity to identify many of the problems we have with our existing equipment and take inventory of the items we will be using and require for the upcoming production work we are looking forward to.

Here are a few pictures from the day!

Tuesday, May 27, 2014

Hot stamp issue

Ran into a problem with the temperatures not working correctly on the hot stamp (HS3). Heater circuit was good so I looked at the temp settings on the controller.

I am not sure how the PID values were changed but apparently they had all been set to the maximum allowable value for each parameter (62578)?

 To fix the problem we looked at one of the other hot stamps to find a reasonable value to input and changed them to match the other properly functioning hot stamp.

We also removed the offset from 90 to 0 so the controller would bring the heat temperature back to set point.

The upper limit is now set at 420, lower limit at 390, and set the temperature for 400. It is now functioning correctly and staying on set point.

It may be possible that the PID values were lost during a past battery change or similar resetting circumstance. This should be something to examine at future battery changes or when similar heat problems occur.

Thursday, May 22, 2014

Molding Crane Issue

Kenny Gibson our moldsetter on nights reported that the crane (closest to assembly) is making an unusual sound. Although it is does remain functional, he has asked to have it inspected before resuming further use.

I listened to it and there is a pronounced "gear/bearing grinding sound" coming from the hoist.

I mentioned the issue to Marty so he can email Walter.

Novatec Dryer 27

Material handlers are still waiting on the motor for the top hat loader that went bad in March. Are we waiting on parts or do we need to remove it from service?

Robot #11

Y axis was bouncing up and doen and screen message said "Robot going to home".
Adjusted the y axis switch flag up and changed y full up position from 54 to 35 to resolve the problem.

Saturday, May 10, 2014

5.9.14 - Sean

Worked on the new Van Dorn Installation further.

Changed the 480 receptacles over to our existing style on MP#20 and #21.

I also pulled down the robot cables on #21 so we can be considering how we want to route them along the machine and where we want to run the air to the robot and air gate valve.

Primed the pumps on the other four machines that have oil in them already.

I left two examples of possible 480 covers we can use on Mark's desk to review.

Have a great day!

Tuesday, May 6, 2014

Busy at work

Although we have all been busy...I was still able to capture a few hard works diligently slaving away at getting the molding shop up and running.

Wednesday, April 16, 2014

Mixer PLC Fault

Cleared the fault on the PLC but did not check the operation because we were not sure if it was supposed to be mixing material right now or not. Switches are all turned off for now. I have included a screenshot of the error for reference.

Thermolators arrived !

Thermolators arrived in great shape.  Beginning the Oreck retrofit modifications at this time.